AIM: In this article, we will see how to route to different
microservices through ocelot gateway. Ocelot is open source and designed for
.Net. Even Microsoft uses ocelot, you can see the implementations in their
articles. Through ocelot:-
- We can create a unified
end point for our microservice and avoid exposing our actual endpoints.
For this we will route to different end points from our ocelot gateway.
Other features
include:-
- API composition (to call
multiple requests in a single request)
- Caching
- Logging
- Authentication
- Authorization
- Load balancing
- Service discovery
In this article, we will discuss on routing and ocelot
implementation in your project. I have created a POC for this and we will use
.NET CORE 3.1 framework in this implementation. A few words on the POC, it is
based on a Hospital system. We have a the following modules in it:-
·
HospitalAPI: - It will help to create and manage Hospital details
for the system.
·
APIGateway: - We have
used ocelot to build this gateway, it routes the incoming requests to
corresponding API’s in the system. In this POC, our point of interest is APIGateway. Let’s see how
to implement ocelot gateway. High Level Steps: Steps to implement ocelot gateway in your project:-
1)
Create ASP.NET Core Web Application. 2)
Download NuGet package “Ocelot” 3)
Add a JSON file to the project (Ocelot.json). We will mention
our routing details in this file. 4)
In the program.cs, we will add the “Ocelot.json” file 5)
In startup, we will configure the middleware and you are done J Steps: Let’s see the steps in detail:-
1) Open visual studio, add a new project and select ASP.NET Core
Web Application. As shown below:- 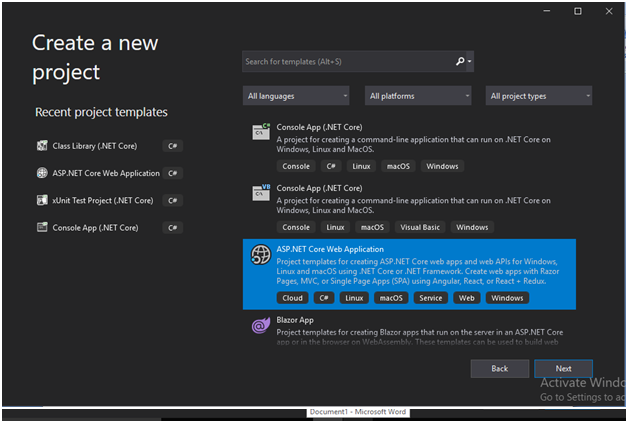
2) Create an empty project and name as APIGateway. In the next
screen make sure you select ASP.NET Core 3.1 framework. 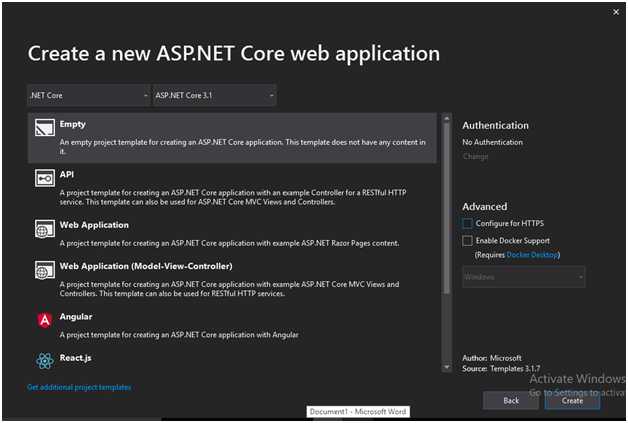
3) Right click on the
APIGateway project -> Dependencies
and then select “Manage NuGet Packages”. In the browser tab, type ocelot and click install, you will see a screen as shown below. 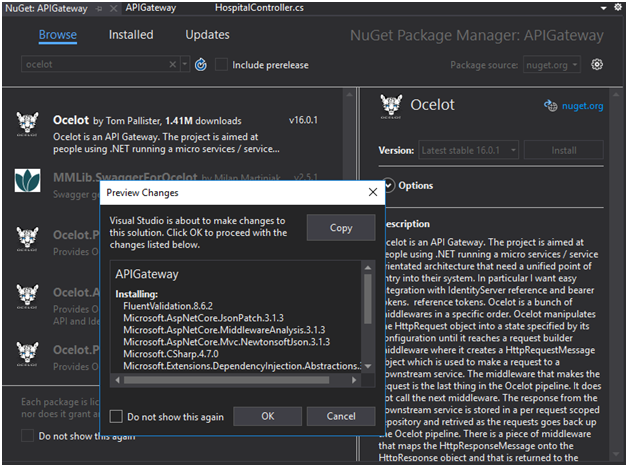 Click “Ok”
button and click “I Accept” button in License Acceptance screen.
4) Right click on
“APIGateway” project, and add a new item. Search for JSON file and name the
JSON file as “ocelot.json” (you can change the name if you want). 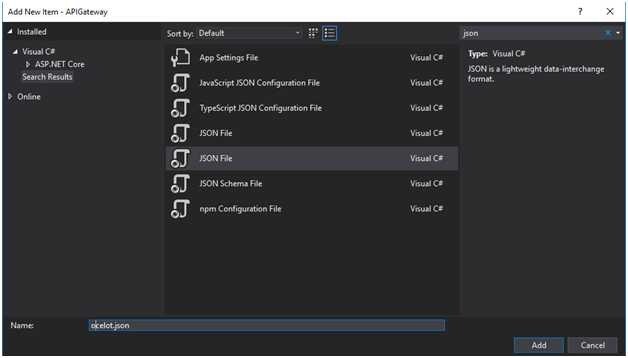
5) Now
we need to add our routing information in “ocelot.json” file. So to mention
routing information we need to create routes by adding "Routes":[ we can mention any number of routing
information here] and inside routes we need to mention 5 informations:- a)
DownstreamHostAndPorts
:- where you can mention the host name or url and port number as shown below:- "DownstreamHostAndPorts":
[ { "Host": "localhost", "Port": "50204" } ] Inside the square brackets, you can mention multiple
host and port numbers set separated by curly brackets and comma ({},). b)
DownstreamPathTemplate:-
Mention the downstream path that is the API path you want to call. For example,
in this case, if you want to call Hospital API, we should mention
“/api/hospital” (where hospital will be the controller name) c) DownstreamScheme: Here you mention your
project support http or https. d) UpstreamHttpMethod: - Select the HTTP verbs
you support in your controller. If you miss to mention the respective
verb, your API call will not work. e) UpstreamPathTemplate: - here you mention the path as how
it should look while you call the API Below
is the routing code which we have used in our ocelot.json file:- "Routes": [
{
"DownstreamHostAndPorts": [ { "Host": "localhost", "Port": "50204" }
],
"DownstreamPathTemplate": "/api/hospital",
"DownstreamScheme": "http",
"UpstreamHttpMethod": [ "POST", "PUT", "GET", "DELETE" ],
"UpstreamPathTemplate": "/hospital" } Like this, we can add multiple route information with
curly brackets and comma ({},). For example, suppose we want to have an action
with a different API URL. In this case you can mention the action name in the
upstream and downstream paths. Or if you want to support multiple action names
with different API URL’s, then add “{everything}” in the upstream and downstream
paths as below:- {
"DownstreamHostAndPorts": [ { "Host": "localhost", "Port": "50204" }
],
"DownstreamPathTemplate": "/api/hospital/{everything}",
"DownstreamScheme": "http",
"UpstreamHttpMethod": [ "POST", "PUT", "GET", "DELETE" ],
"UpstreamPathTemplate": "/hospital/{everything}" } So finally, your ocelot.json file will look like below:- 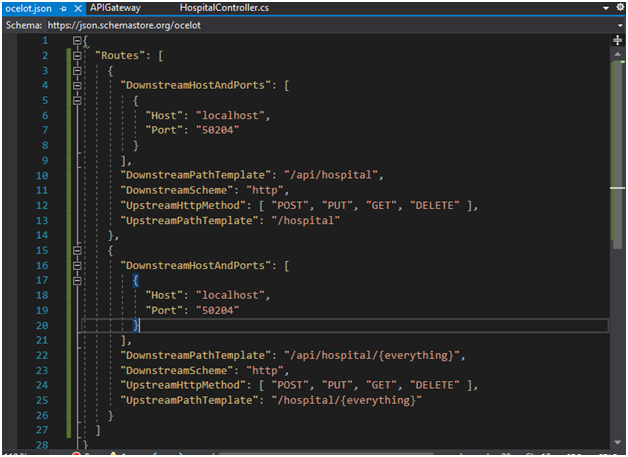 Save the file. 6) Now
let’s add the “ocelot.json” file in program.cs. Inside the static method “CreateHostBuilder”,
add the below code to add the JSON file. .ConfigureAppConfiguration((hostingContext,config)=> {
config.AddJsonFile("ocelot.json"); }); So
your program.cs will look like below:- 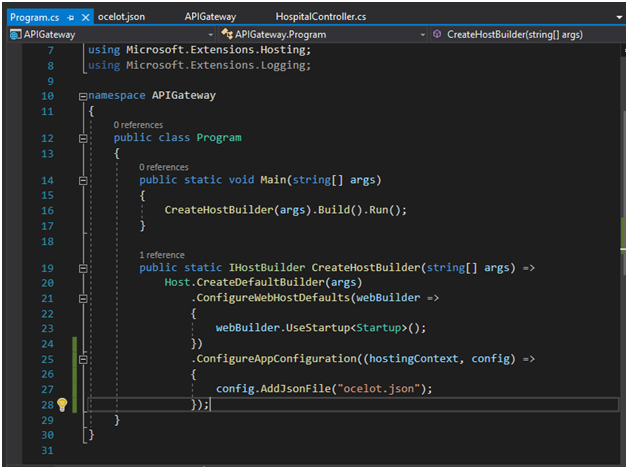 7) And
in Startup.cs, add the middleware. a)
For
this add “services.AddOcelot();”
in ConfigureServices method and add the using “using
Ocelot.DependencyInjection;”. b)
Also to
add middleware, add “app.UseOcelot();”
in Configure method. Since this is an async call, add wait and make the method
async. Also you will have to add using “using
Ocelot.Middleware;” So your Startup.cs will
look like below:-
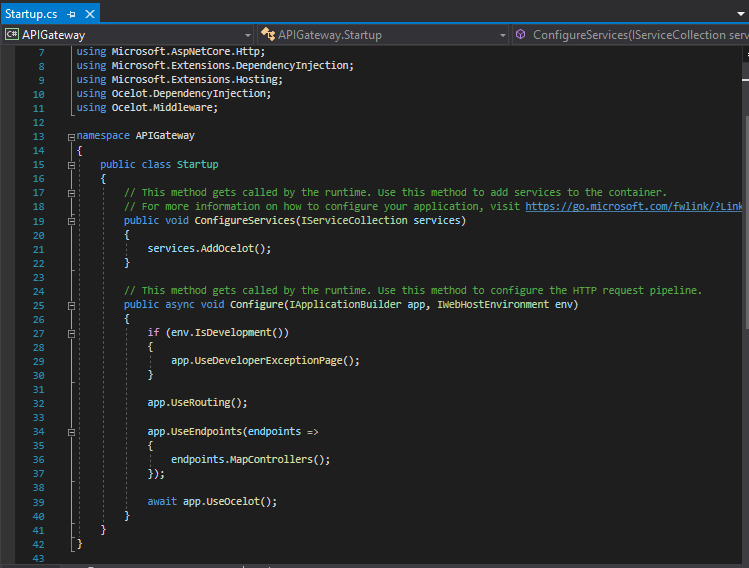
If you are having multiple projects or API’s in your solution,
you will have to select multiple startup projects, so that your gateway and API will run at the same time. If your API is not started and only your gateway is
working, we will not be able to call the API and vice versa. To enable multiple
startup projects, right click solution and select properties. Then select
“Multiple startup projects” and start individual projects (as shown below) and click apply. 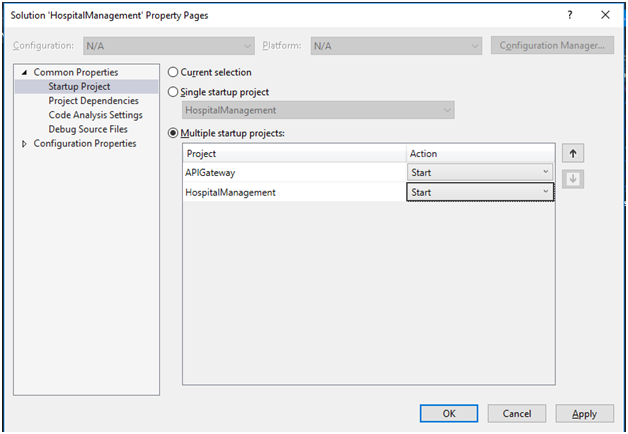 Now run your project and you have implemented ocelot gateway in
your project. Congratulations!! Let us try to test in Postman. In my machine, the ocelot gateway
URL is http://localhost:50374/ and to
test it in postman follow the below steps:-
1)
Open
postman
2)
Click
new and add a basic request:-
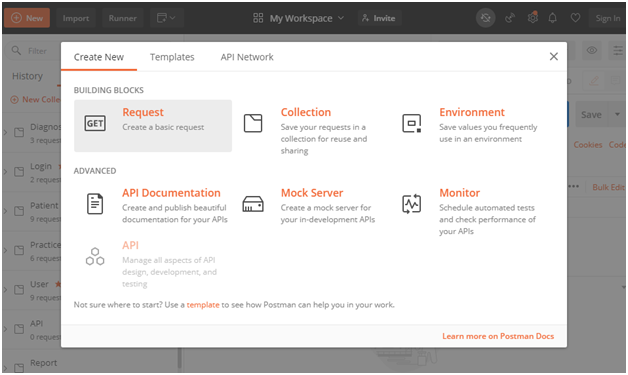
Let
us try to get hospital details when we pass hospital id. So give the below
information and click save
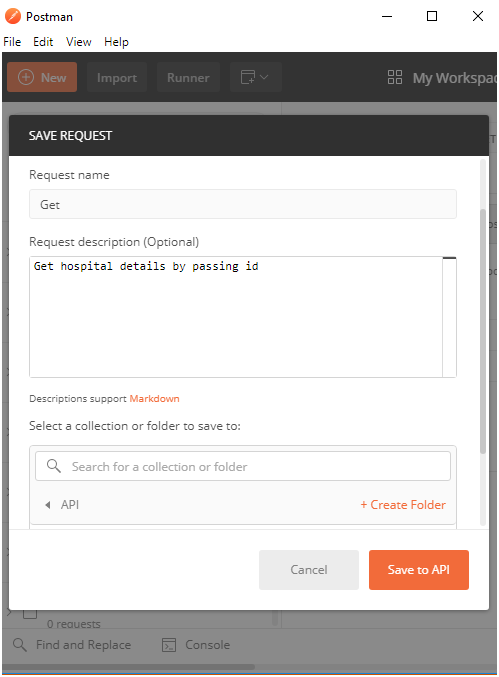
3)
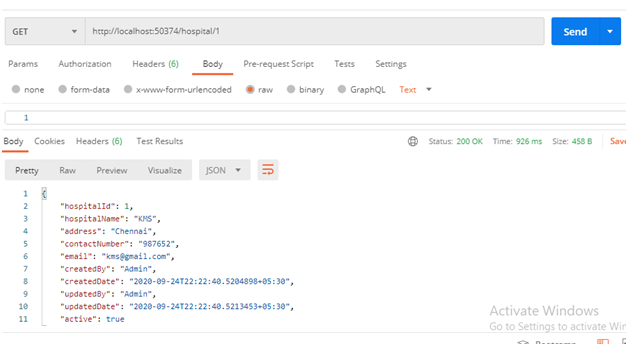
Now in
the next screen, select the HTTP verbs, in this case it is : “Get”. Add the API
Gateway URL:- http://localhost:50374/
and the controller name:-hospital
and also give the hospital id as
below:-  4) Then
click “Send” button and you will see the below information in the postman “Body”
section, as per our code in POC.
Thank
You
Happy
Coding J |