Step 2:
Import the Express.js module
and create the web server as shown below.
webserver.js: (file name)
var express = require('express');
var app = express();
var config = {
"user": 'sa',
"password":
'########',
"server":
'#######\\SQLEXPRESS',
"database":
'master',
"port":
'1433',
"dialect":
"mssql",
"dialectOptions": {
"instanceName":
"SQLEXPRESS"
}
};
// define routes here..
var server = app.listen(8080, function () {
console.log('Node server is running..');
});
In the above example, we imported Express.js
module using require() function. The express module returns a function. This
function returns an object which can be used to configure Express application
(app in the above example).
The app object includes methods for routing
HTTP requests, configuring middleware, rendering HTML views and registering a
template engine.
The app.listen() function creates the Node.js
web server at the specified host and port. It is identical to Node's
http.Server.listen() method.
Run the above example using node webServer.js command and point your browser to http://localhost:8080.
It will display Cannot GET / because we have not configured
any routes yet.
Step
3: [Configure routes] Use app object to define
different routes of your application. The app object includes get(), post(),
put() and delete() methods to define routes for HTTP GET, POST, PUT and DELETE
requests respectively.
The following example demonstrates configuring
routes for HTTP requests.
webserver2.js:
(file name)
var express = require('express');var app = express();
app.get('/', function (req, res) {res.send('<html><body><h1>Hello World</h1></body></html>');});
app.post('/submit-data', function (req, res) { res.send('POST Request');});
app.put('/update-data', function (req, res) { res.send('PUT Request');});
app.delete('/delete-data', function (req, res) { res.send('DELETE Request');});
var server = app.listen(8080, function () { console.log('Node server is running..');});

In the above example, app.get(), app.post(),
app.put() and app.delete() methods define routes for HTTP GET, POST, PUT,
DELETE respectively. The first parameter is a path of a route which will start
after base URL. The callback function includes request and response object
which will be executed on each request.
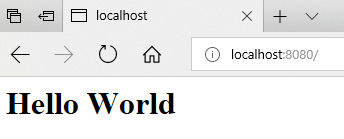
Run the above example using node webServer2.js command, and point your browser to http://localhost:8080/ and you will see the following result.
Below figure showing the command prompt window

Below figure showing the web page result in browser
There is another example for Post method shown below.
var express = require('express');
var path = require('path');
var app=express();
var bodyParser = require("body-parser");
app.use(bodyParser.urlencoded({ extended: false}));
app.get('/', function (req, res) {
res.sendFile(path.resolve('index.html'));
});
app.post('/submit-student-data', function (req, res) {
var name = req.body.firstName+ ' ' +req.body.lastName;
res.send(name+'Submitted Successfully!');
});
var server = app.listen(8080, function () {
console.log('Node
server is running..');
});
Html File[index.html(File name)]:
<!DOCTYPE html>
<html
xmlns="http://www.w3.org/1999/xhtml">
<head>
<meta charset="utf-8" />
<title></title>
</head>
<body>
<form action="/submit-student-data" method="post">
First Name: <input name="firstName" type="text" /> <br />
Last Name: <input name="lastName" type="text" /> <br />
<input type="submit" />
</form>
</body>
</html>

Run the above example using node webServer2.js command, and point your browser to http://localhost:8080/ and you will see the following result.
Below figure showing the command prompt window

Below figure showing the web page result in browser
 If you click on submit button show next page like below.

To retrieve data from the web page, we can use below methods.
1. req.query.variableName: It is used to retrieve data from Url-query from web page.
2. req.body.textboxName: It is used to retrieve data from text boxes or inside the body from web