Introduction
Gone are the days where we manually move the code to
different environments and losing of time in checking the files are properly in
SYNC across all environments. After using CI-CD tools, manual deployment has removed
and various code & deployment best practices can integrate in build and
Deployment Pipeline. After deployment, Orchestration/Cloud computing tools helping
the system to scale up/down the deployments based on the request for more
availability of a resource.
Though we have automated deployments, there are challenges
in moving our build to different environments/systems due to missing of software’s
in the destination machines. We may need to spend some level of checks to
ensure the required software’s are present in the environment before
deployment. To eliminate this drawback, docker help to package the files along
with supporting packages that will help the application to run independently
without looking for software to run the application inside OS.
This Article targets
the below areas in explaining how to create docker images and containers with
simple steps,
1. To create simple Service API using .Net
Core
2. Packaging the Files and necessary
components to create “Docker” Image
3. Run the Image using “Docker” Containers
4. Pushing the Docker Image into Docker hub
Repository
Docker
Docker is an Open Source tool
that will help to create, deploy and run applications using Containers.
Containers allows developers to package an application with all parts it needs
(like project dependencies, supporting framework) and create an Image (Package)
out of it. Docker gives run time environment called, as Container. Packaged
image will push into container and expose it for outer world. The same
image/package can push to different environment without worrying about the required
softwares are present in the environment except Docker!
Docker uses Hypervisors native
to the Operating system. However, Docker on Windows and OSX still runs inside
the Linux Virtual Machine. (Specifically, it uses the lightweight Alpine Linux
Distribution)
1.
xhyve on OS X 2.
Microsoft Hyper-V on Windows
Docker for Desktop can be
downloaded from here.
Prerequisites
1.
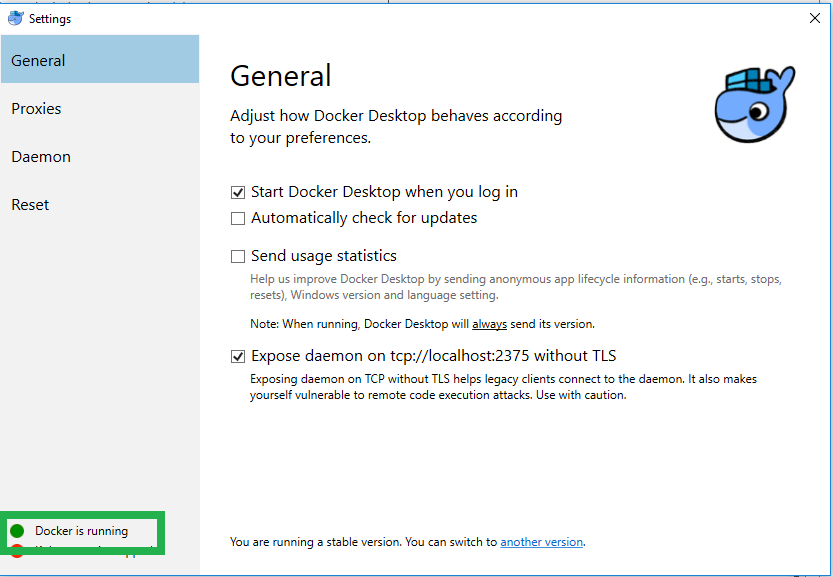
Docker Desktop should be present on windows and
Hypervisor should be running on a machine. 2.
Should have knowledge in developing Service API
using .Net Core (or) .Net Framework. I have used .Net core to create the
service. Docker should be running on your machine. 
Service
API using .Net Core
Let's create simple service API to create docker image out of it. Follow the below instructions to create the same. Step 1:
Create Service API using .Net Core by selecting “Web API”
template. We are going to expose the API using Docker container. Below in the
end point code,
[Route("api/[controller]")]
[ApiController]
public class ValuesController : ControllerBase
{
// GET api/values
[HttpGet]
public ActionResult<IEnumerable<string>> Get()
{
return new string[] { "value1", "value2" };
}
// GET
api/values/5
[HttpGet("{id}")]
public ActionResult<string> Get(int id)
{
return "Value of API " + id.ToString();
}
}
Step 2:
Make sure the Project is running successfully in the
Localhost and able to access the API. This is just verification step.
Step 3:
Create the “dockerfile” to get the required packages while
packing it. Place it in the root directory of the project. I have given my
dockerfile code below for reference.
FROM microsoft/dotnet:sdk AS build-env WORKDIR
/app # Copy
csproj and restore as distinct layers COPY *.csproj ./ RUN dotnet
restore # Copy
everything else and build COPY . ./ RUN
dotnet publish -c Release -o out # Build
runtime image FROM microsoft/dotnet:aspnetcore-runtime WORKDIR
/app COPY
--from=build-env /app/out . ENTRYPOINT ["dotnet",
"MyServiceAPI.dll"]
Packaging
File using Docker command
Step 1:
Open Powershell/CMD Prompt with Administrator Rights.
Step 2:
Navigate to the Folder and Run the below command
docker build -t mycurrentapp .
This will download necessary packages from the Docker Hub
and creates a Package (i.e. image).
Step 3: To
check Image created, run the below command
docker images
You will be able to see the list of images in your docker
repository.

Docker
Container
Create a container by publishing your image using the below
command. Docker container will help the Image/Package to run inside it.
To run the container, Port needs to be assigned; I have used
5060 to expose an image from the container.
Use the below command to Port an Image inside the container,
docker run -d -p 5060:80 --name myserviceapi mycurrentapp
To view the containers which are present in your docker, run
the below command.
docker container ls docker ps
Below will the output for the above commands (run and container ls),

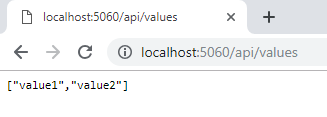
You will be able to see the output in your browser as below. 
When you update the code, you need to refresh the image and re-deploy
it in the container to use the updated functionalities of your Service API. To Stop the existing running container, use the below command. docker container stop <container id>
To Start the existing container, use the below command. docker container start <container id>
To view complete details about the container, use the below command. docker container inspect <containerid>
To view Network details about container, use the below commands docker inspect <<containerid>> -f "{{json .NetworkSettings.Networks }}" docker inspect -f '{{range .NetworkSettings.Networks}}{{.IPAddress}}{{end}}' <<containerid>> To remove the existing container, use the below command. consider stopping the container before removing it.
docker container rm <container id> To remove the existing image, use the below command
docker rmi <image id> Push
Image into Docker Hub Repository
Step 1:
Sign up into docker hub through Powershell.
docker login
Enter
username & password and make sure you logged into the Docker Hub portal.
Step 2: Tag
Your Image
Run the
below command to tag your image
docker tag <ImageName> <username>/my-image:part1
Step 3:
Push your Image to Docker Hub
docker push <ImageName> <username>/my-image:part1
Above command will push the
image into your docker hub repository and you can pull and re-use it later (or) on
different environments. You can view more docker commands in the below link. https://docs.docker.com/engine/reference/commandline/ps/
That is! Now you have learnt how to create docker image and
docker container. In the next article, we will see how to use docker in Linux
Containers, Kubernetes and Container Orchestration process. |