Step1: Add Telerik RadGriew
reference to your project. Same will be found in this link . Step
2: Include the telerik
controls namespace in your xaml file as shown below; <Window x:Class="TelerikGridSampleApplication.MainWindow" xmlns="http://schemas.microsoft.com/winfx/2006/xaml/presentation" xmlns:x="http://schemas.microsoft.com/winfx/2006/xaml" Title="MainWindow" Height="350" Width="525" xmlns:Controls="clr-namespace:Telerik.Windows.Controls;assembly=Telerik.Windows.Controls.GridView"> Step
3: Add
telerik 'RadGridView' control to your xaml file, and set the property ‘AutoGenerateColumns’
to ‘True’, so that the coulmns will be automatically generated based on the
objects binded. I have also added a button called ‘Export to Excel’ and we are
going to export data to excel in the click event of this button. <Grid> <Grid.RowDefinitions> <RowDefinition Height="Auto"/> <RowDefinition Height="*"/> <RowDefinition Height="Auto"/> </Grid.RowDefinitions> <TextBlock Grid.Row="0" Text="Telerik Grid Example" Foreground="CadetBlue" FontSize="20" FontWeight="Bold"HorizontalAlignment="Left" VerticalAlignment="Top"/> <Controls:RadGridView x:Name="radGrid" Grid.Row="1" AutoGenerateColumns="True" HorizontalAlignment="Stretch" VerticalAlignment="Stretch"></Controls:RadGridView> <Button x:Name="ExportButton" Grid.Row="2" Content="Export To Excel" HorizontalAlignment="Right"VerticalAlignment="Bottom" Click="ExportButton_Click" /> </Grid> Step
4: In the code behind, create
a class to bind data to the rad grid. For simplicity, I have created a class
‘Student’ as shown below; public class Student { public string StudentName { get; set; } public int RegisterNumber { get; set; } public int TotalMarks { get; set; } } Step
5: Let’s create a list of
students with dummy data and assign the list to radgrid as source. private void PopulateRadGridWithData()
{ var Student1
= new Student { StudentName = "Student 1", RegisterNumber = 302001, TotalMarks = 420 }; var Student2
= new Student { StudentName = "Student 2", RegisterNumber = 302002, TotalMarks = 340 }; var Student3
= new Student { StudentName = "Student 3", RegisterNumber = 302003, TotalMarks = 280 }; var Student4
= new Student { StudentName = "Student 4", RegisterNumber = 302004, TotalMarks = 444 }; var Student5
= new Student { StudentName = "Student 5", RegisterNumber = 302005, TotalMarks = 300 }; var dataList
= new List<Student> {
Student1, Student2, Student3, Student4, Student5 };
radGrid.ItemsSource = dataList;
} Step
6: Now we need to invoke the
method 'PopulateRadGridWithData()' in the constructor of code behind, so that
the rad grid will be populated with data when the page is loaded. public MainWindow()
{
InitializeComponent();
PopulateRadGridWithData();
} Step
7: We
have rad grid ready, now let's export it to excel on button click event of
‘Export to Excel’ button. In radgrid, we can achieve
this by calling the method Export(). The input parameters of this method are
‘Stream’ object and ‘GridViewExportOptions’ object. You need to create an excel
file and convert it to filestream object and give this object as an input to
Export() method, so that the contents are written directly into this stream.
GridViewExportOption determines the format in which you want to export your
data, whether you need to include headers of the readgrid or not and few more
options. private void ExportButton_Click(object sender, RoutedEventArgs e) { var directory = @"D:\POCs\ExportToExcel"; var fileName = "StudentReport.xls"; if(!Directory.Exists(directory)) { Directory.CreateDirectory(directory); } if(File.Exists(directory+@"\"+fileName)) { File.Delete(directory+@"\" + fileName); } using (FileStream fileStream = File.Create(directory
+ @"\" + fileName)) {
radGrid.Export(fileStream, new GridViewExportOptions(){Format = ExportFormat.ExcelML,
ShowColumnHeaders = true, Encoding = Encoding.Unicode}); } MessageBox.Show("Successfully
Exported.", "Result"); } Step 8:
That’s it; you have created a simple WPF application with
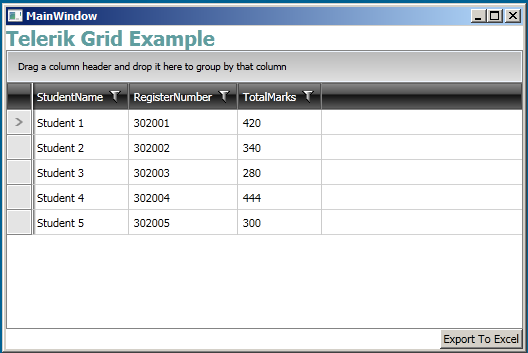
rad grid and export to excel functionality. If you run this application, you’ll
get output as shown below;
Generated Telerik Grid:
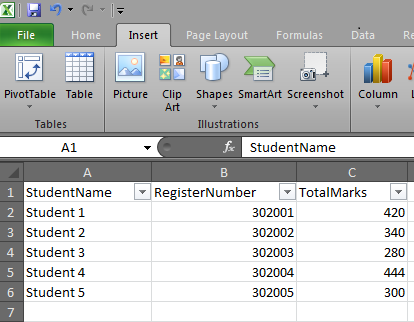
Generated Excel:
|